New User Quickstart
This section is the Quickstart for if you have been added to a team that has already been setup or are exploring in one of the sample teams. If you need to set up a team (add roster, logos, etc.), please see the New Team Quickstart page.
Login
To create an account, simply login using the options at the top of the page. You will automatically have access to any teams that you have been added to in the dropdown at the top of the page. Because this is based on your email address, you will have to validate your email address if you login in with an email and password.
Then, log in with the same email address from any device to access your teams from anywhere!
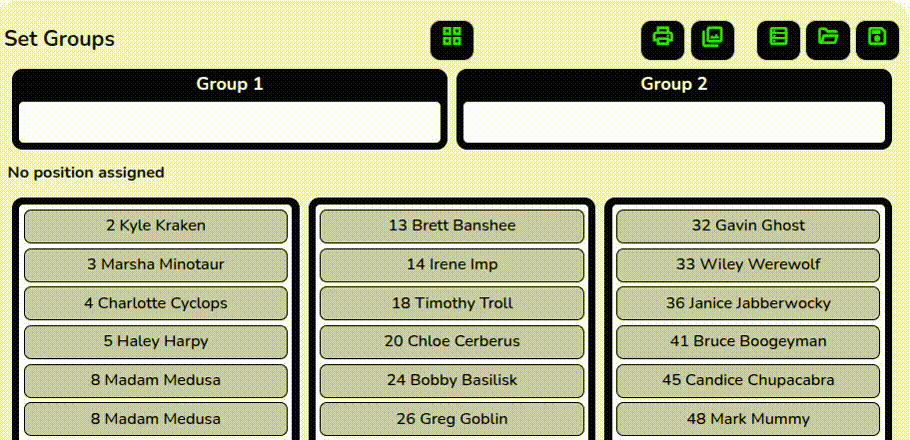
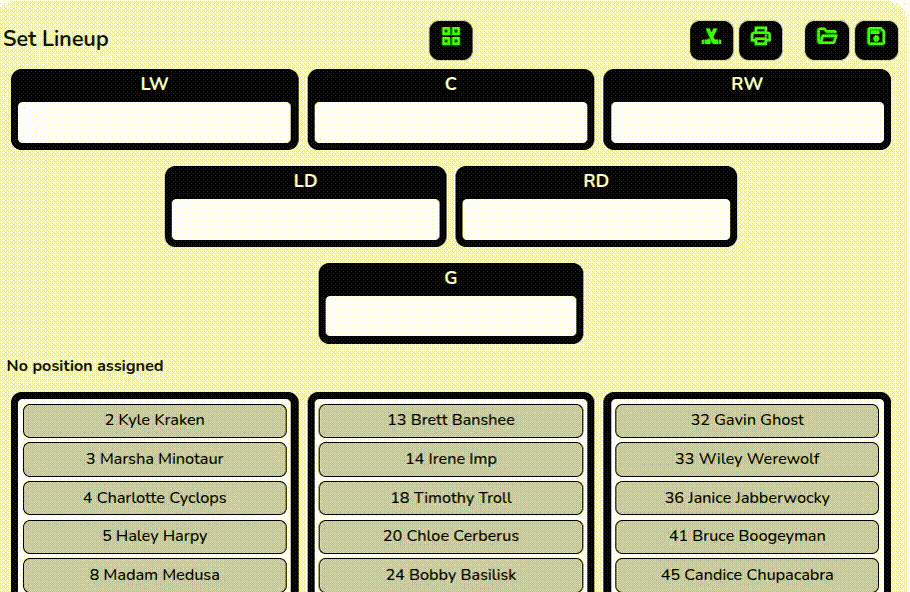
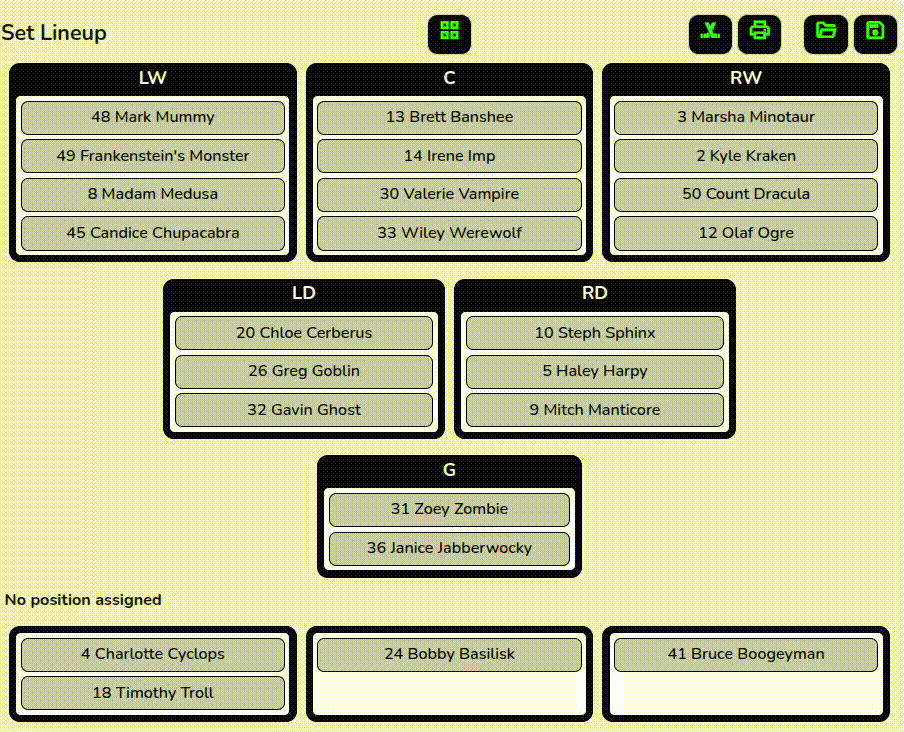
Work on lineup or groups
When you first open Lineup Monster, it will default to the “Lineup” tab. This tab has options for standard positions and formations along with sport-specific output options. For greater customization, you can click on the “Groups” tab, which will let you make practice groups, pick teams, display kids by age-group, or anything else you can imagine. Most of the features are the same on the two tabs, and so will be presented together in this guide.

Load a saved lineup or groups
If other users have already gotten started, you can load their saved lineups and groups by clicking on the folder icon folder_open at the top right. It will open this dialog:
Select the save that you want to load, then click “Load” in the bottom right. Note that the user’s name is listed after the lineup (in parenthesis) for lineups created by other users. Your lineups will always show up first in the list, sorted by how recently you saved it, followed by lineups from other users of the team.
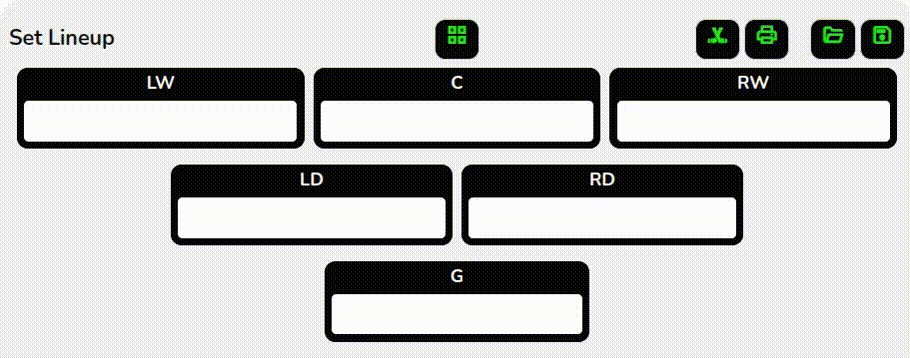
Make changes to the lineup or groups
This is the simplest part: just drag and drop! Click or hold on a player’s label and drag it to the spot you want, then let go.
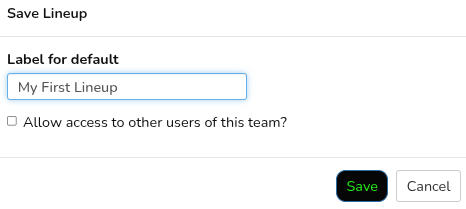
Save lineup or groups
To save a lineup or groups, just click on the save icon at the top right, then enter the label for your save. You can’t save over other people’s lineups (they each show up in your list with other users names after their saves), so you can use the same name as another user. Note that if you use the same name as one of your other saves, however, the latest version is the only one that will be available.
You can also select if your saved lineup will be available to other users of the team or not with the checkbox under the label.
Sport-specific outputs
Sport-specific outputs, like a press layout for hockey, are available by clicking on the sport-icon at the top right of the lineup tab. For example, the sports_hockey icon will be available on hockey teams to generate a press output.
Each sport is different, but fill in the options on the screen and click “Generate Output” at the bottom right (the button name will reflect the type of layout for your sport)
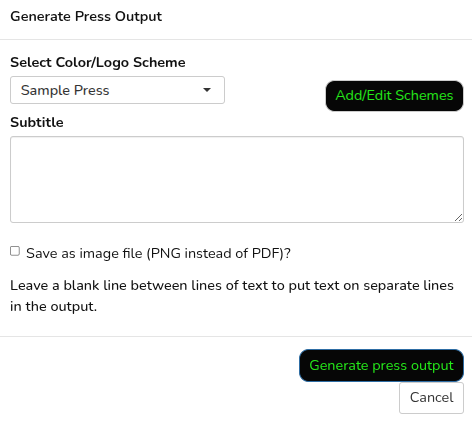
The Color/Logo scheme can be customized for your team (see Colors, Logos, and Schemes section for more details), and Pro teams can have multiple schemes to select from.
Note that you can save the output at an image instead of a PDF by checking the “Save as image file” box.
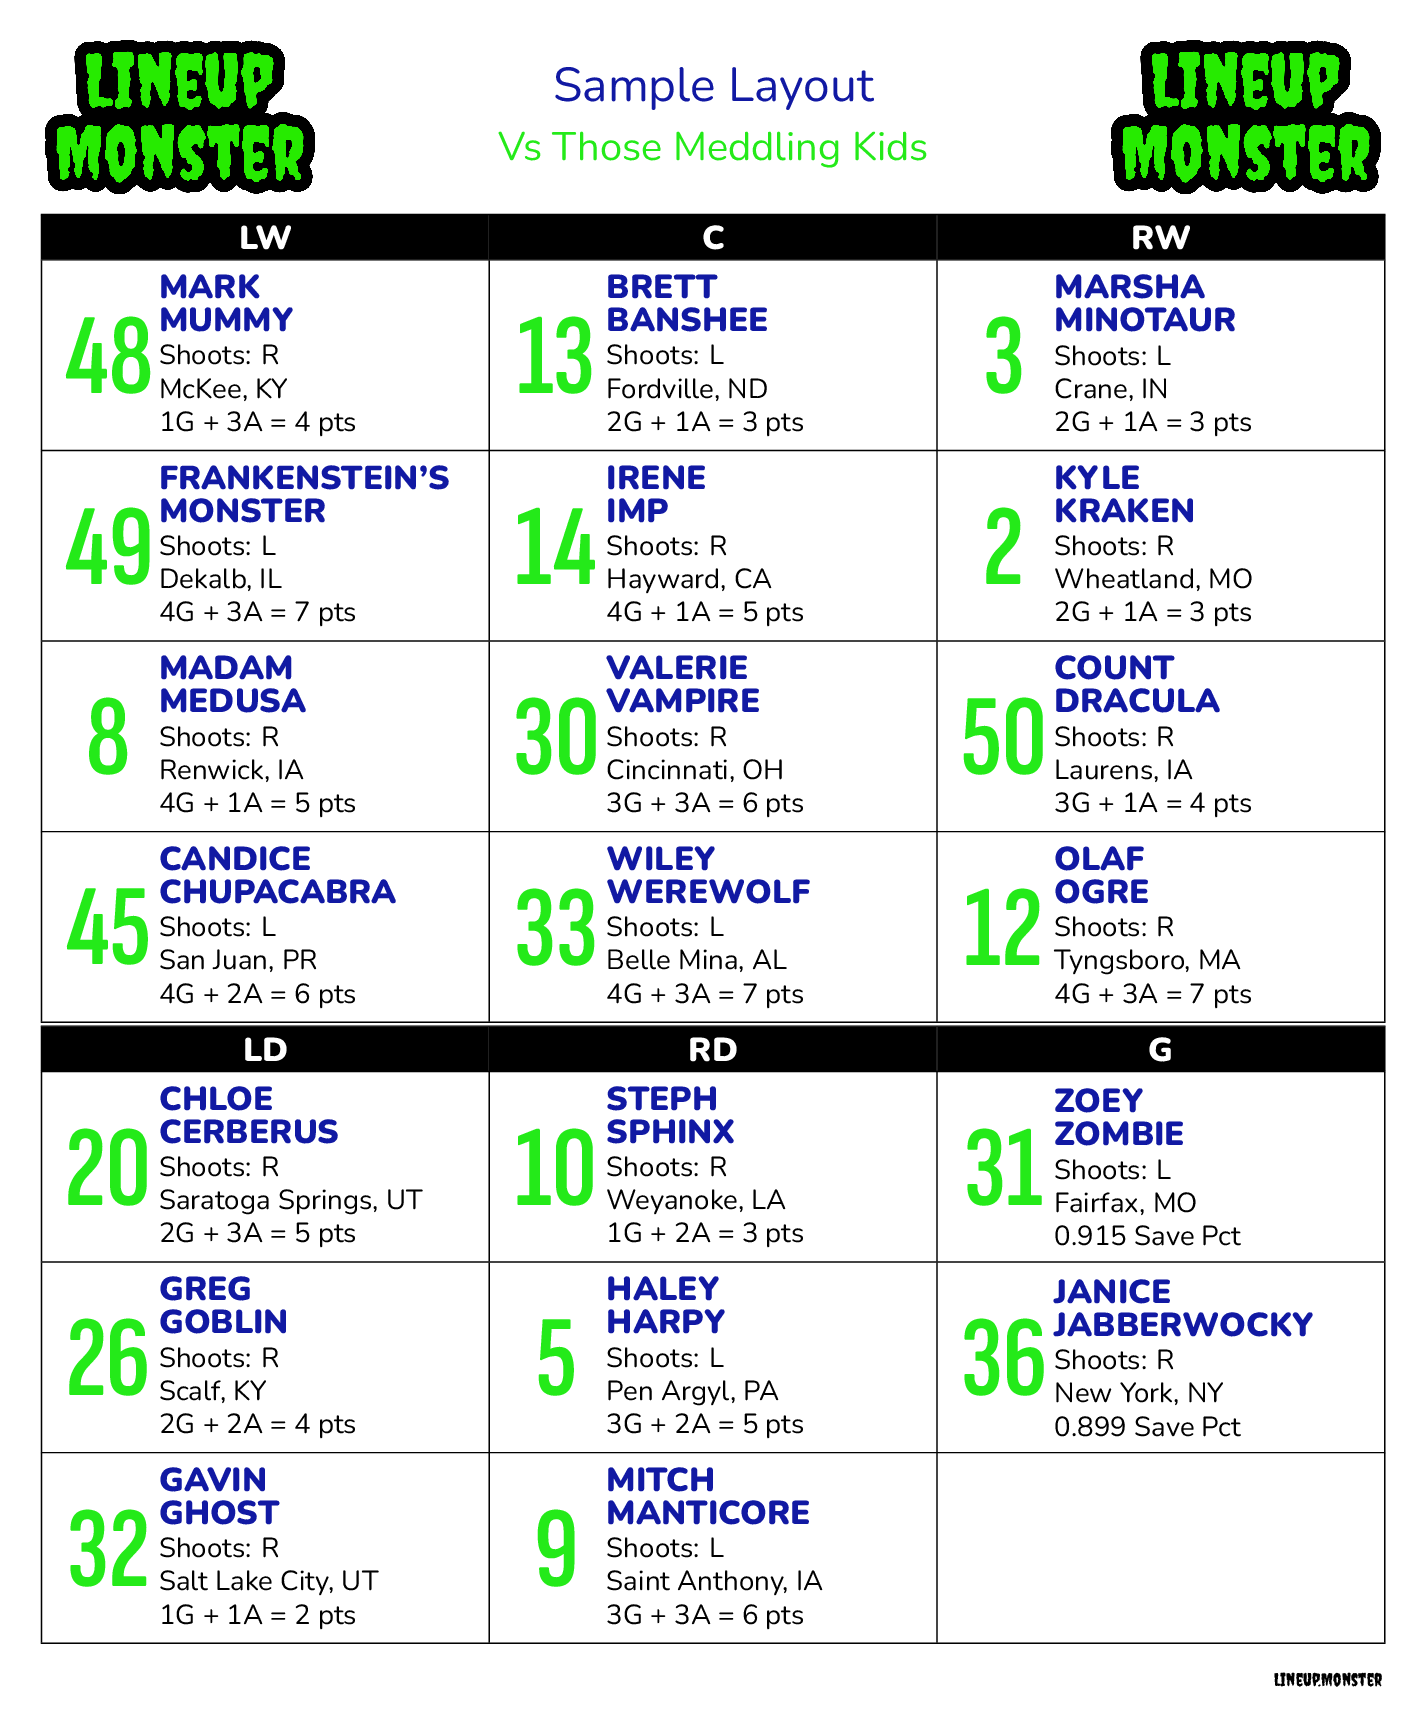
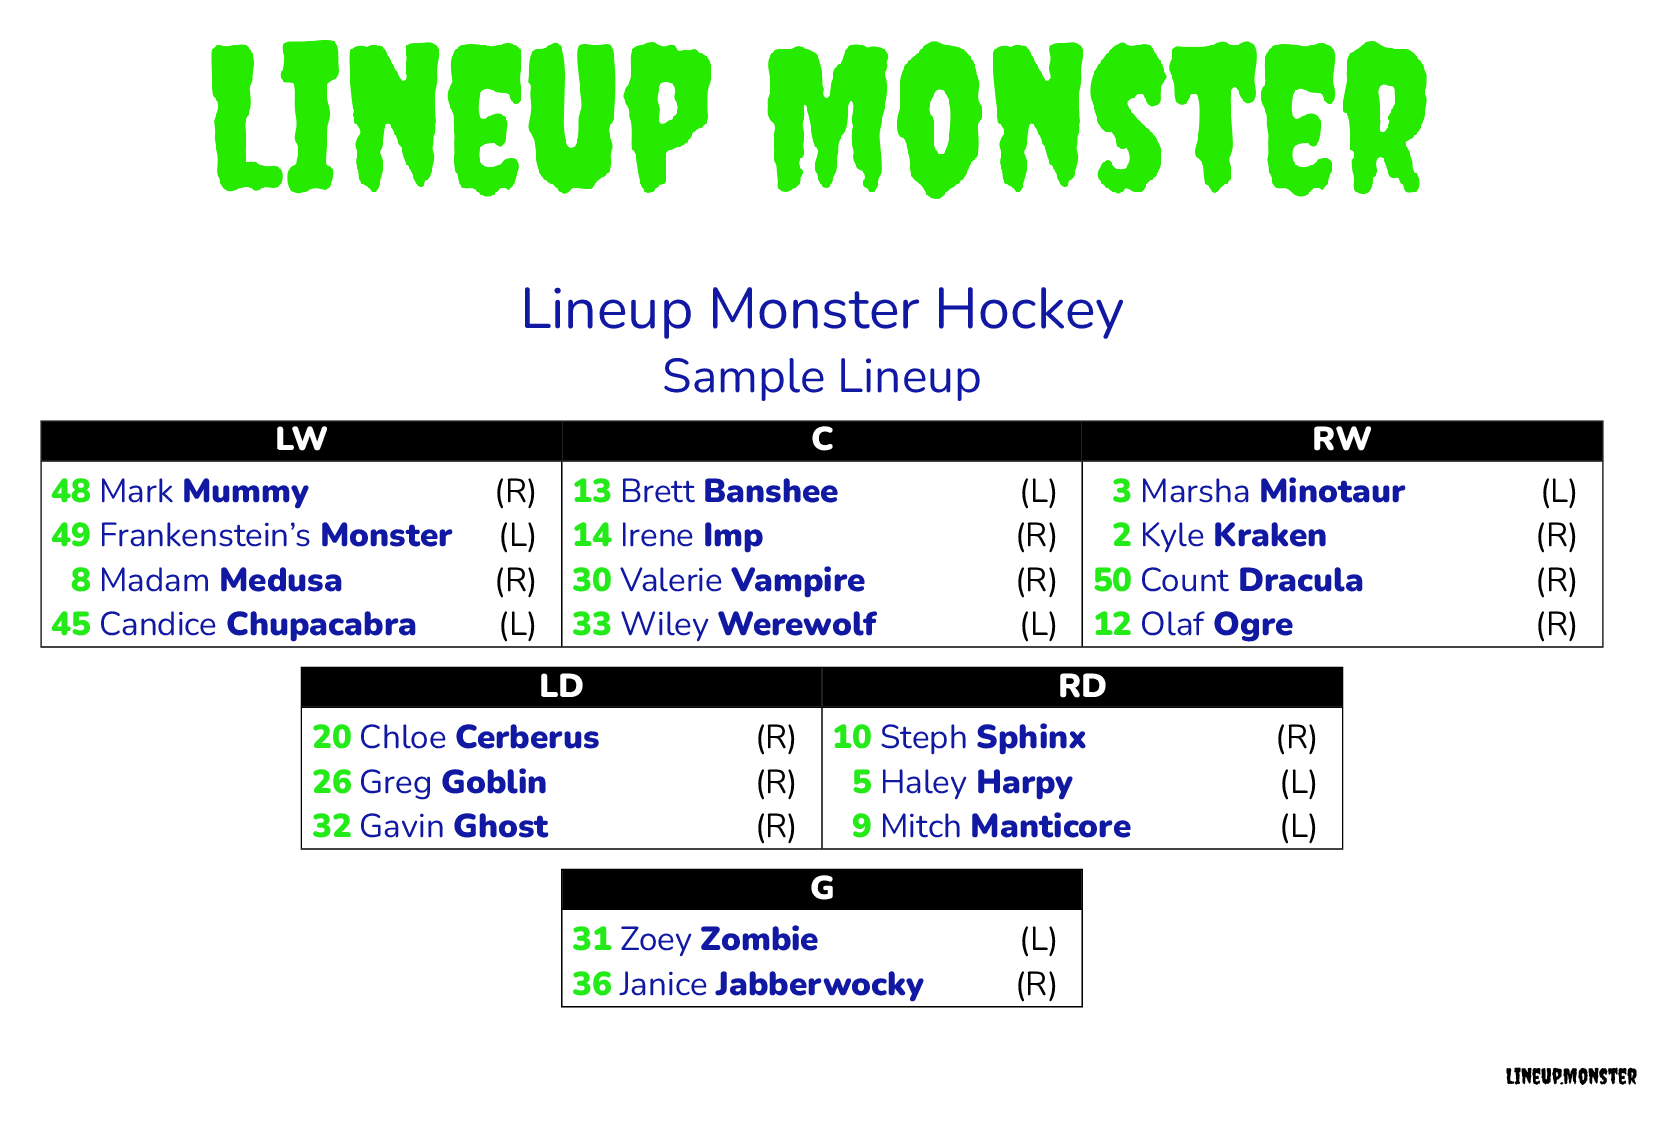
Here is an example Hockey Press output.
Base outputs
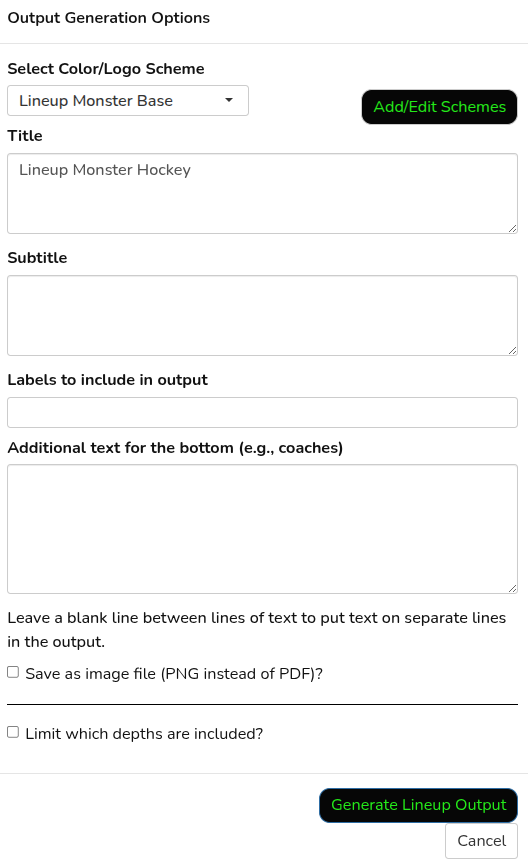
For both lineups and groups, you can download an output file that is not sport-specific as well. Click on the print icon to open up the output dialog box.
Then, change any of the settings you want to customize your output. Click the “Generate” button and wait for the output to be created. This can take a few moments, especially with large rosters or big graphics, so be patient.
As with the sport-specific outputs, you can customize the logos and colors for base outputs as well. Pro teams can have multiple output formats to choose from.
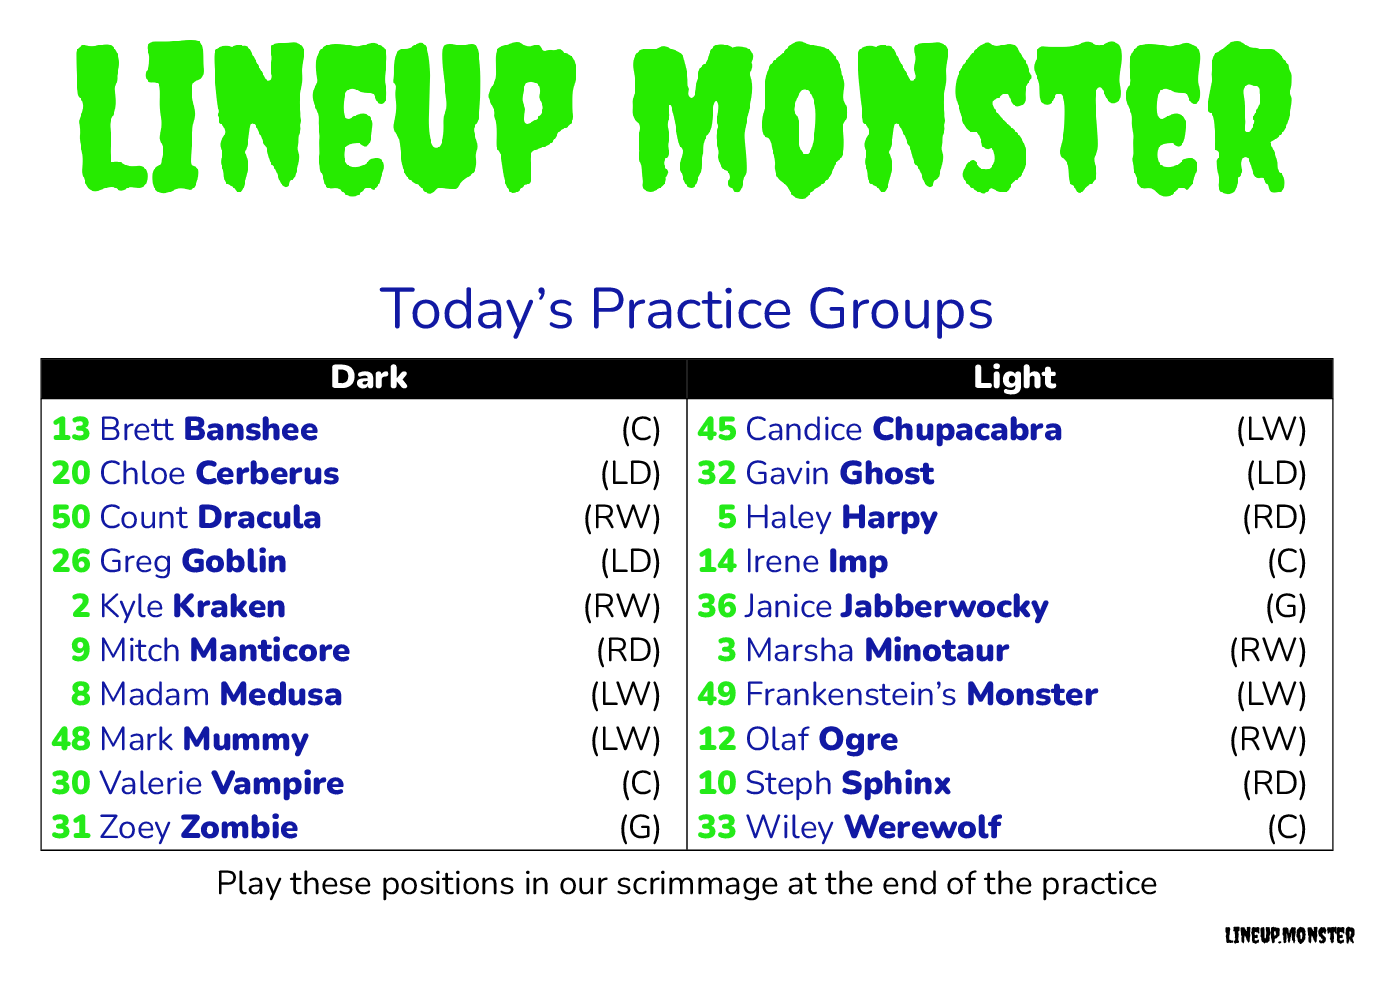
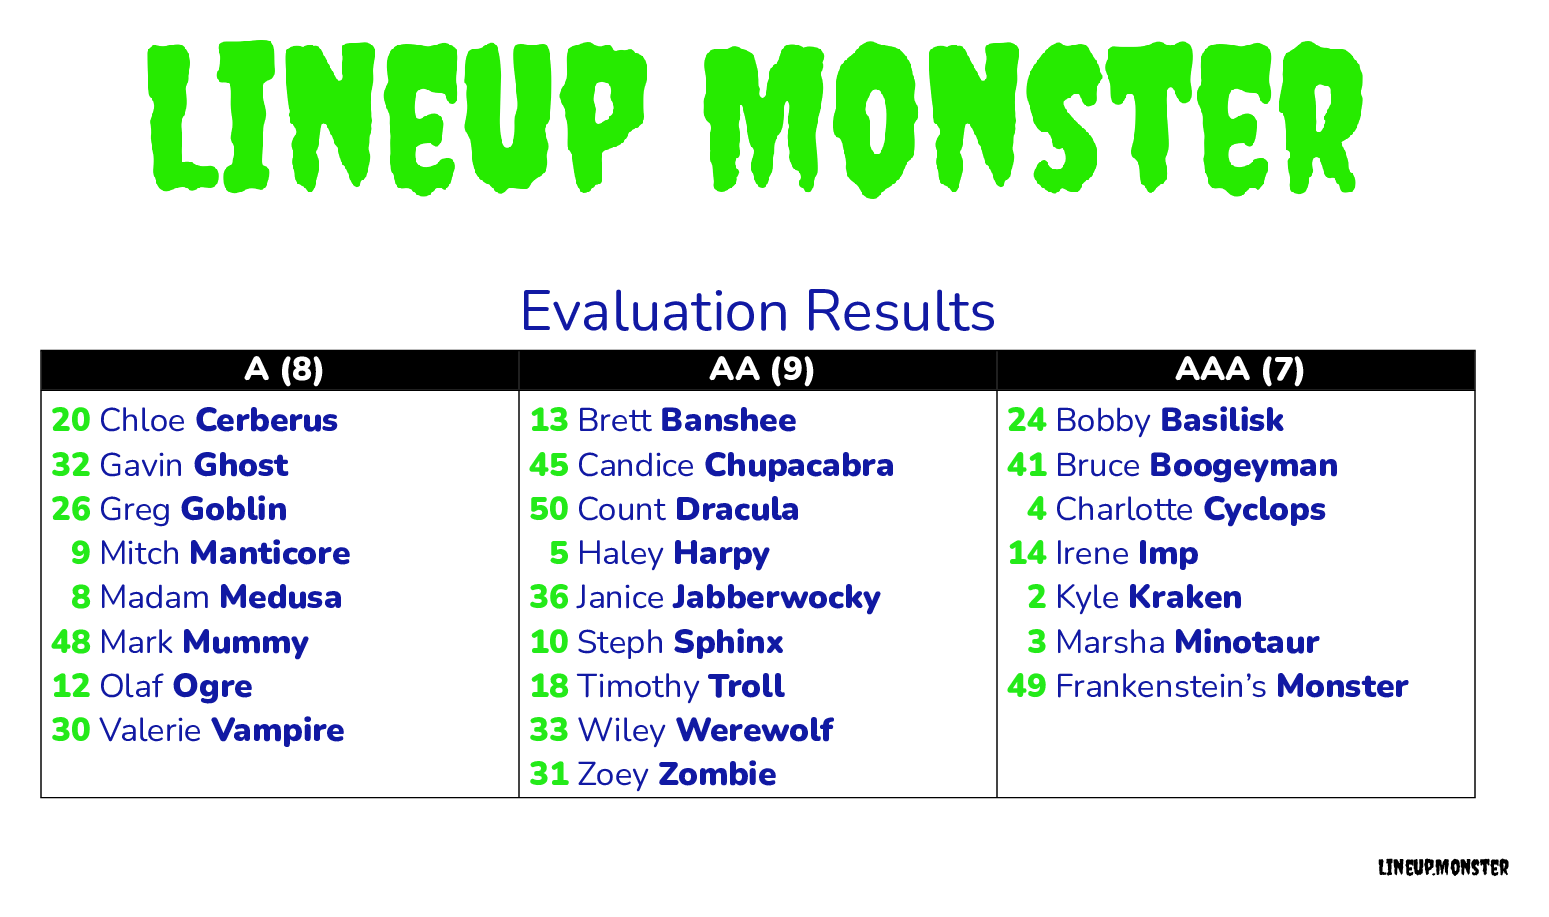
Here are three example outputs:
Change the lineup layout
You can also change the lineup layout for sports that have more than one formation. Click on the grid_view icon in the top middle and select the layout you want. For now, you can only select lineups that have already been created. If you want a new formation added, email us at support@lineup.monster with the layout you’d like us to add.
Set custom groups
The Groups tab allows you to create as many groups as you want with any group names. To do this, click on the grid_view icon in the top middle. In the settings here, you can customize the groups and layout to match your needs, including custom names and even the ability to display the number of individuals in each group.
Click “Update the groups” to apply the changes and start working with your custom groups.