New Team Quickstart
This section is the Quick Start for setting up a new team (add roster, logos, etc.).
If you are joining a team that has already been setup, or after you finish setting up your team, check out the New User Quickstart for more general information.
Roster
There are two approaches to creating a roster from scratch: uploading or manually entering. Both steps happen in the Roster tab.
Uploading a Roster
If you already have a roster as a csv or Excel format, you can upload it directly. For Excel files, only the first tab/sheet is included when uploading.
Start by clicking on the note_add icon in the top-right of the roster tab. This will open a dialog box that contains this option to upload your roster file:
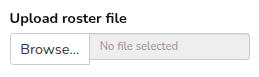
Click “Browse” and select your roster file. The columns from the file will then be recognized and given as options. First, pick which columns contain the number, first name, and last name of your players. These columns are reserved in Lineup Monster as they are used in specific locations.
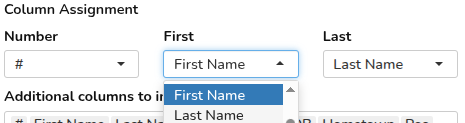 Next, select all of the columns you want to add to your roster.
By default, all columns in the file are included.
Next, select all of the columns you want to add to your roster.
By default, all columns in the file are included.
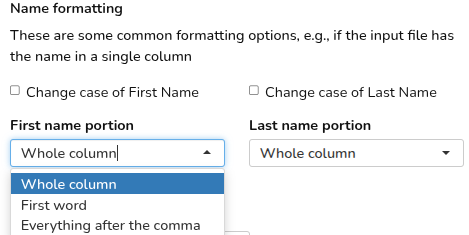
 Then, you can change the formatting of your name columns.
This is especially useful if you have just one column for name in your input
(e.g., “John Smith”) that you want to split into first and last names
or if your names are in all-caps.
Then, you can change the formatting of your name columns.
This is especially useful if you have just one column for name in your input
(e.g., “John Smith”) that you want to split into first and last names
or if your names are in all-caps.
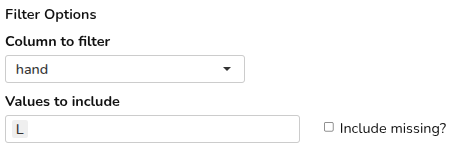
The last optional step is to apply a filter. This can be useful, for example, if your roster includes players from a tryout who were not selected, or if you are making separate teams for two groups of players from a roster file. In this screenshot, the upload would be limited to just the lefties from our roster file.
Once you are done with these options, review the roster, confirm that it looks the way you’d like, and click “Add These Players” to upload your roster.
Manually add a roster
You can also manually add players and columns to your roster. You can do this either instead of uploading a roster or in addition (e.g., if you add a player/column that is not in your roster file).
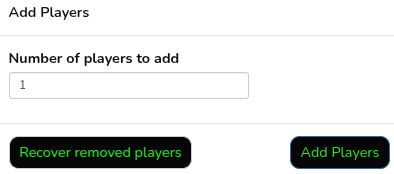
To add players, click the group_add symbol in the top middle of the roster tab. Then, set the number of players to add and click “Add Players.”
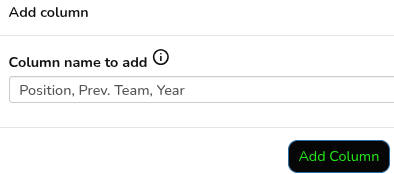
To add columns, click the splitscreen_vertical_add symbol in the top left of the roster tab. Then, type the names of the columns to add (separateing them by commas) and click “Add Column.”
Then, you can type in all of the player info

Settings
The big-picture options for your team are available in the Settings tab. We’ll walk through each of these dialogs
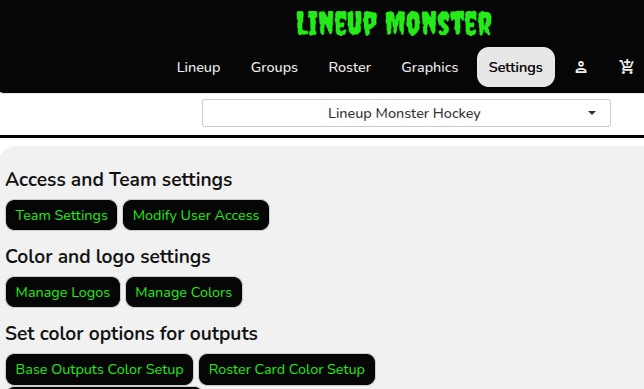
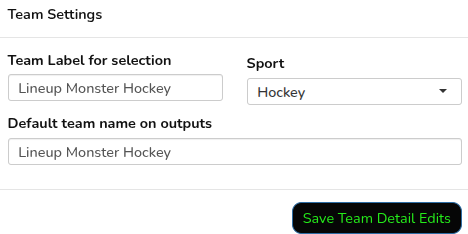
Team Settings
Here, you can set your team name separately for the way it appears in the team-selection dropdown and for the default for outputs. You can also change the sport for your team, which will change the default formations available.
Modify User Access
Here, you can add users by entering their email addresses in the box at the top. Users have access to the team, but can’t change anything on the Settings tab or modify the roster. Admins have full access to the team.
You can also revoke access to the team for any users or reduce someone to non-admin access.

Manage Logos
Make sure that “Add a logo” is selected, then select a logo file, give it a label, and click “Save new logo.”
![]()
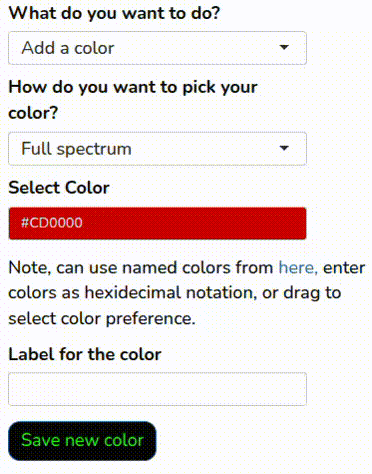
Manage Colors
To add a new color, you can either select from a palette, which will give you a base set of colors to choose from, or select your exact team color from the full hex-color spectrum.
When selecting in full spectrum, you can either click in the color space to find your color or you can type a color name or hex value. Once you have your color, give it a label and click “Save new color.”
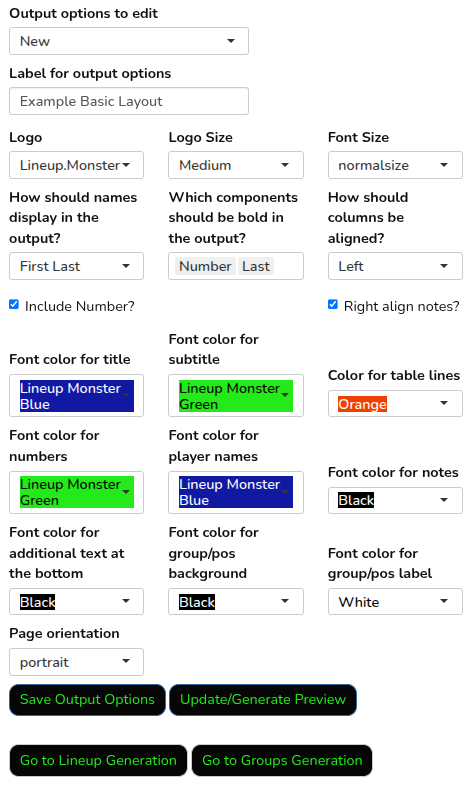
Set color options for outputs
Each of the output types allows users to set custom color templates using the logos and colors you’ve added. Click on each output type to see the setting options. Give your output scheme a name an customize away. Pro teams can have an unlimited number of different output schemes, so you can set formats for different needs (e.g., home and away games).
To see what your outputs will look like, click “Update/Generate Preview.”
When you are happy, click “Save Output Options.” The output format will then be available to select when making outputs from the Lineup or Groups tabs, or when making a roster card from the Graphics tab.